How to Replace a Shower Head (Even a Stuck One)
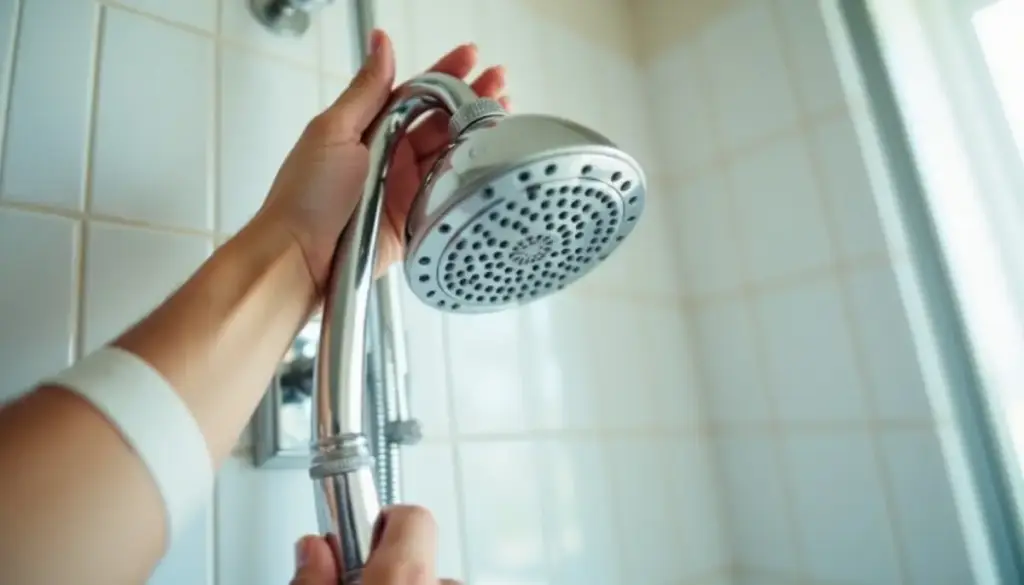
How to replace a shower head comes down to five moves: unscrew the old head counterclockwise, clean the arm threads, wrap fresh thread seal tape, thread the new head on hand-tight plus a little, and test for leaks.
Key Takeaways
- Federal rules cap a showerhead at 2.5 gallons per minute measured at 80 psi, per the DOE standard in 10 CFR 430.32(p).
- EPA WaterSense labeled heads must use no more than 2.0 gpm, and EPA says the average family could save 2,700 gallons a year by switching.
- Showering accounts for nearly 17 percent of residential indoor water use, according to EPA WaterSense.
- Kallista, a Kohler brand, tells installers to use thread sealant tape on the shower arm and never pipe dope, which can plug spray outlets.
- Hold the shower arm with a second tool while you loosen the old head so the torque never reaches the elbow inside the wall.
What tools do you need to replace a shower head?
You need an adjustable wrench or tongue-and-groove pliers, a rag or strap wrench to protect the finish, a roll of 1/2-inch thread seal tape, an old toothbrush, and a towel to cover the drain. Add a gallon zip bag, white vinegar and penetrating oil if the old head looks crusted. Before reinstalling the new fixture, check whether your model needs the flow restrictor removed to restore full water pressure.
Buy the new head before you start. If you are still choosing, our rundown of the main shower head types covers fixed, handheld, rain and combo units. Confirm the box says 1/2-inch NPT, which matches the arm on nearly every US shower.
How do you remove an old shower head without damaging the arm?
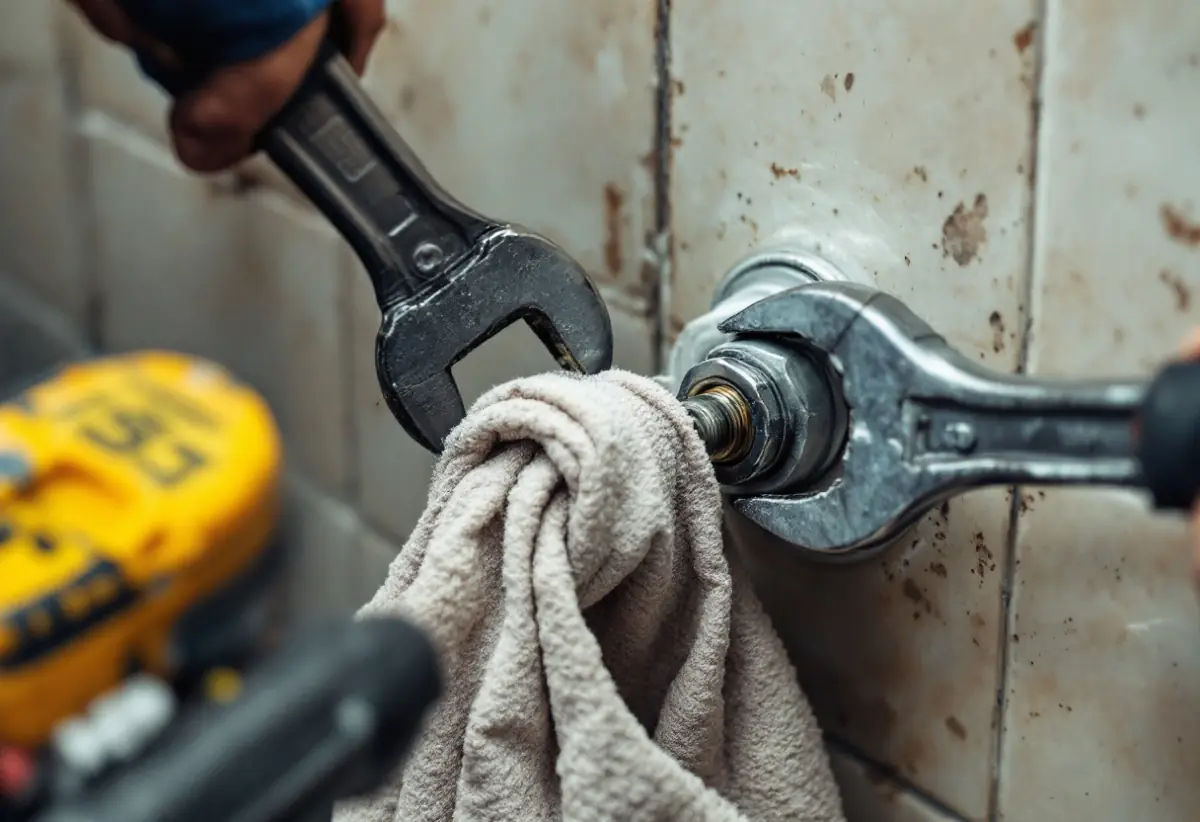
Turn the shower valve off, plug the drain with a towel, then grip the head’s connecting nut and turn it counterclockwise. Try by hand first. If it will not move, wrap the nut in a rag, set an adjustable wrench on it, and hold the shower arm near the wall with a second wrench or pliers so only the head turns.
The second tool matters. The arm screws into a drop-ear elbow behind the tile. If you crank on the head and the arm turns with it, you can loosen the joint inside the wall, and that leak shows up weeks later as a stain on the ceiling below.
- Shut off the shower valve. If the valve will not fully close, shut the main.
- Cover the drain and lay a towel in the tub or pan.
- Hold the arm still near the wall with a padded wrench or pliers.
- Turn the head’s nut counterclockwise, by hand if possible, with a rag-wrapped wrench if not.
- Spin the head off and pull the old tape and any washer remnants off the arm.
How do you remove a stuck shower head?
A stuck shower head is usually locked by mineral scale or corrosion in the threads. Fill a gallon bag with white vinegar, slip it over the head so the nut sits in the liquid, rubber-band it to the arm and leave it overnight. For metal-on-metal corrosion, spray penetrating oil into the joint, wait about 15 minutes, then try the two-wrench method again.
Use steady pressure; a sudden yank can snap the arm or twist it in the wall. If the head is plastic and still will not budge, it is often faster to cut the nut off with a hacksaw, keeping the blade clear of the arm threads.
The same vinegar soak works as routine upkeep, and our guide on how to clean a shower head walks through it so the new one stays clear.
Do you need plumber’s tape for a shower head?
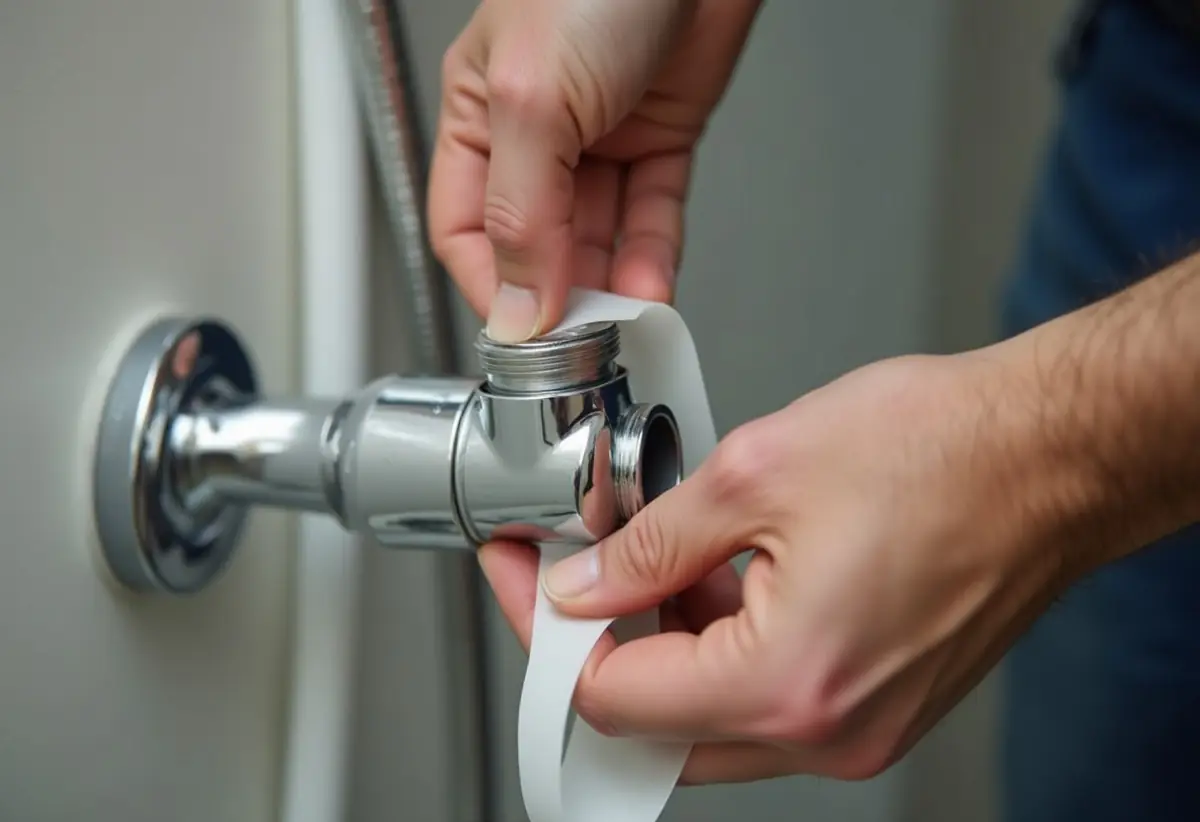
In most installs, yes. Thread seal tape fills the small gaps in the arm threads, stops weeping at the joint and makes the head easier to remove years from now. Kallista, a Kohler brand, puts it plainly in its showerhead instructions: use thread sealant tape on the shower arm threads and do not use pipe dope, because dope can plug the spray outlets.
The Kallista showerhead with arm instructions also say to flush the system with the head off and to make sure the screen is seated in the head before you thread it on. Grit knocked loose during removal can make a new head spray weakly on day one.
Which way and how many wraps?
Wrap clockwise as you face the open end of the arm, the same direction the head turns as it threads on. That way tightening smooths the tape into the threads instead of unwinding it. Two or three snug wraps is the common trade practice for a 1/2-inch arm; more than that can keep the nut from seating. If you want the details on tape grades and widths, see how plumber’s tape works.
Some plastic and magnetic-mount heads seal on a rubber washer alone; follow the insert in your box.
How do you install a new shower head step by step?
Clean the arm threads, wrap two or three clockwise turns of tape, check that the washer and screen sit inside the new head’s nut, then thread it on by hand. Snug it with a strap wrench or a rag-wrapped wrench, often about a quarter turn past hand-tight, and run the water to check for drips.
- Scrub the arm threads with a toothbrush and vinegar until no old tape or scale remains.
- With the head still off, run the water for a few seconds to flush grit out of the arm.
- Wrap the threads clockwise with two or three layers of tape, starting at the first full thread.
- Check that the rubber washer and screen are seated in the head’s nut.
- Thread the head on by hand. If it binds after a turn or two, back it off; it is likely cross-threaded.
- Snug it with a strap wrench or padded wrench, holding the arm with your other hand.
- Turn the water on full, then check the joint with a dry tissue for any seep.
A plastic nut cracks under a full wrench pull, and an over-crushed washer leaks just like a loose one.
How is installing a handheld or rain shower head different?
A fixed head threads straight onto the arm. A handheld adds a bracket or diverter that threads onto the arm, then a hose to the wand. A large rain head often needs an arm extension or a ceiling arm to get enough height and clearance, and its weight puts extra load on the elbow inside the wall.
| Head type | What threads onto the arm | Extra parts | Install watch-outs |
|---|---|---|---|
| Fixed head | The head’s own ball nut | None | Tape the arm, seat the washer, hand-tight plus a little |
| Handheld only | A wall-arm bracket or mount | Hose, hose washers | Tape the arm only; hose ends seal on washers and usually go on hand-tight |
| Fixed plus handheld combo | A diverter body | Diverter, hose, holder | Tape the arm under the diverter; the fixed head threads onto the diverter outlet |
| Rain head (wall) | An arm extension or longer arm | Extension arm, sometimes a new escutcheon | Check ceiling clearance; a heavy head strains the drop-ear elbow |
| Rain head (ceiling) | A ceiling arm into a ceiling elbow | New supply in the ceiling | Needs new piping above the ceiling, usually a plumber job |

What flow rate should a new shower head have?
Every showerhead sold in the US must flow no more than 2.5 gallons per minute at 80 psi under the DOE showerhead standard, a cap Congress set in the Energy Policy Act of 1992. Heads that earn the EPA WaterSense label use no more than 2.0 gpm and must still pass a spray test, so lower flow need not mean a weak shower.
Those figures come from the EPA WaterSense showerhead page. The flow limit is met by a small plastic flow restrictor or a molded flow control inside the head. Removing it can push flow well past the label, may void the warranty, and can break local rules where a state sets a lower cap. If flow feels weak, check the screen for grit and your house pressure first.
DOE has issued enforcement guidance on multi-nozzle showerheads. For a single replacement head, buy one labeled 2.5 gpm or less.
The chart is plain arithmetic: flow rate times 10 minutes times 365 days, for one person. Dropping from 2.5 to 2.0 gpm saves 1,825 gallons a year per daily showerer, before any water heating savings. For real-world shower lengths and totals, see how much water a shower uses.
One safety catch the box rarely mentions: Kallista’s instructions say a 2.0 gpm head should be paired with an automatic compensating valve rated 1.6 gpm or less. An older pressure-balance valve built for higher flow may not hold temperature as well at low flow. If water swings hot after you switch to a low-flow head, have the valve checked.
Why does a new shower head leak, and when is the arm or valve the problem?
A new shower head that leaks at the joint almost always has a tape, washer or threading problem you can fix in minutes. Water that shows up behind the escutcheon, inside the wall, or from the head after the valve is off is different. Those point to the arm, the elbow or the valve cartridge, and the head is not at fault.
| Problem | Likely cause | Fix |
|---|---|---|
| Drip at the arm threads | Too little tape, tape wrapped backward, or cross-threading | Remove, rewrap two or three clockwise wraps, rethread by hand |
| Spray from the swivel ball | Missing, folded or hard rubber washer in the nut | Reseat or replace the washer; snug a little more |
| Weak or uneven spray on day one | Grit on the inlet screen, or low house pressure | Remove head, rinse the screen, flush the arm, then check pressure |
| Water behind the escutcheon or a ceiling stain below | Arm loosened at the drop-ear elbow during removal | Remove arm, retape, reinstall; call a plumber if the elbow is loose |
| Arm threads cracked or crumbling | Corrosion or a past overtightening | Replace the shower arm, a cheap part that unthreads from the elbow |
| Steady drip from the head with the valve off | Worn valve cartridge or seats | Replace the cartridge; a new head will not stop it |
| Temperature swings after switching to low flow | Valve not rated for the lower flow | Check the valve rating against the head; a plumber may swap the cartridge |
Replacing a shower arm is still a DIY job if the elbow holds firm: unthread the arm counterclockwise, tape the new arm’s wall end, thread it in and snug it with a strap wrench. If the elbow moves when you turn the arm, stop. Fixing it means opening the wall, and that belongs to a licensed plumber.
How we sourced this
We reviewed the top-ranking how-to guides for this query in October 2026 to map what they cover, then went to primary sources for every number. Flow limits come from the DOE appliance standards program (10 CFR 430.32(p)) and the EPA WaterSense showerhead program; tape, flushing and valve guidance comes from a current Kallista (Kohler) showerhead installation sheet. The annual water chart is our own arithmetic from stated flow rates and an assumed 10-minute daily shower. We left out unverified claims such as typical install times from retailers and pre-1992 flow rates we could not trace to a primary source.
Frequently asked questions
Do you need plumbers tape for a shower head?
Usually yes. Thread seal tape on the shower arm threads helps stop drips and makes the head easier to remove later. Kallista, a Kohler brand, tells installers to use tape on the arm threads and never pipe dope, which can plug the spray outlets. A few plastic heads seal with a rubber washer alone, so read the insert in the box first.
Which way do you wrap plumbers tape on a shower arm?
Wrap it clockwise as you face the open end of the arm, the same direction the new head turns as it threads on. That way tightening the head smooths the tape into the threads instead of peeling it back. Start at the first thread, keep the tape flat and snug, and stop before the tape hangs past the end of the pipe.
How do you remove a shower head that will not come off?
Wrap the nut in a rag and turn it counterclockwise with an adjustable wrench while a second wrench or pliers holds the shower arm still. If it will not move, soak the joint overnight in a bag of white vinegar to dissolve scale, or spray penetrating oil and wait 15 minutes. Then try again with steady pressure, never sharp jerks.
How tight should a shower head be?
Hand-tight plus a little. Thread it on by hand until it stops, then give it a small extra turn with a wrench or strap wrench, often about a quarter turn. Overtightening can crack a plastic nut, crush the washer or twist the arm loose inside the wall. If it still drips, add tape rather than force.
Why is my new shower head leaking at the connection?
The usual causes are too little tape, tape wrapped the wrong way, a missing or folded rubber washer inside the nut, or a head that went on cross-threaded. Take it off, check the washer, rewrap the arm with two or three clockwise wraps and thread it on by hand before snugging it with a wrench.
Can I remove the flow restrictor from my shower head?
Physically it is often possible, but manufacturers fit restrictors so the head meets the federal limit of 2.5 gallons per minute at 80 psi. Removing one may void the warranty, raise water and water heating bills and break local rules where lower caps apply. Weak flow is more often a clogged screen or low house pressure.
Are shower head threads a standard size?
In US homes the shower arm almost always ends in 1/2-inch NPT pipe thread, so most heads sold here fit without an adapter. Older or imported fixtures can differ. Check the package for 1/2-inch NPT and measure the outside of the arm threads, which runs a little over 3/4 inch on a standard 1/2-inch pipe.
Can I replace a shower head myself?
Yes. A standard swap needs only an adjustable wrench, a rag and thread seal tape, and no wall work at all. Call a plumber if the arm spins or leaks inside the wall, if the arm threads are cracked, or if water keeps dripping with the valve off, since those point to the elbow or valve behind the tile.
Do you have to turn the main water off to change a shower head?
No, in most cases you only need to turn off the shower valve before loosening the old head. The article says to shut off the shower valve, and only shut the main water supply if that valve will not fully close. Covering the drain with a towel is also recommended before starting the swap.