Kitchen Sink Basket Strainer Replacement: Parts, Putty, and Steps
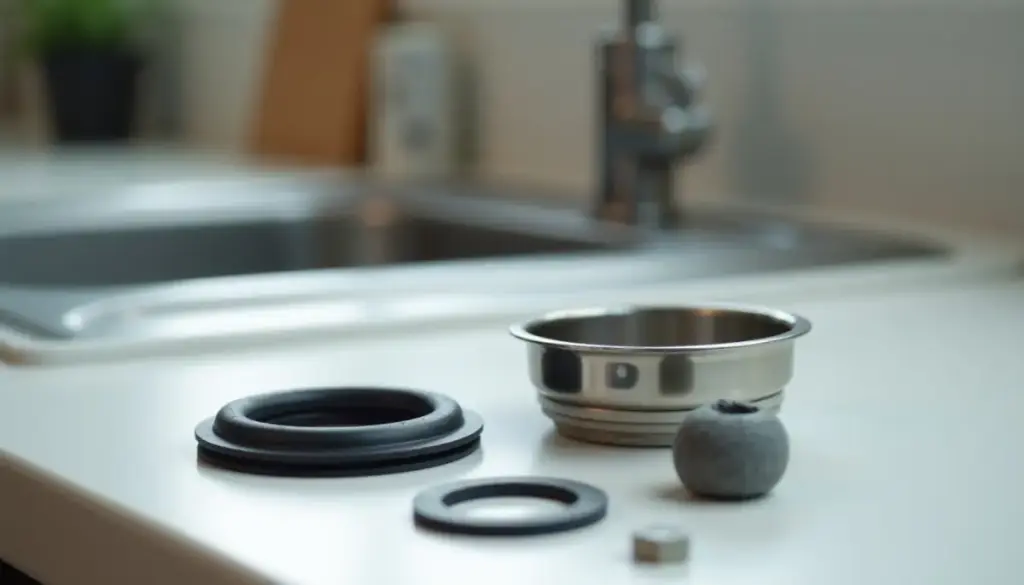
Kitchen sink basket strainer replacement takes one 3-1/2 inch strainer kit, a rope of putty (stain-free putty or silicone on stone and composite), a locknut tool and a full-bowl leak test.
Key Takeaways
- Moen’s 22036 is sold as a 3-1/2 inch strainer but, per Moen, fits sinks with a standard 3-5/8 inch outlet, so the hole is slightly larger than the label.
- Kohler’s K-8799 Duostrainer spec sheet lists it for 3-1/2 inch (89 mm) or 4 inch (102 mm) outlets, in solid brass, sold less tailpiece.
- Moen’s 22036 spec sheet lists a 1-1/2 inch, 11.5 NPSM outlet thread and a 0 to 3/8 inch sink thickness range.
- Oatey formulates its Stain-Free Plumber’s Putty for basket strainers on granite, marble, quartz and other porous stone.
- October 2026 listings put the Moen 22036 at $14.37 to $28.94 and the Kohler K-8799 at $80.28 to $144.50, depending on retailer and finish.
What parts does a kitchen sink basket strainer replacement need?
A kitchen sink basket strainer replacement needs seven parts: the strainer body with its flange, the removable basket, a sealant under the flange, a rubber gasket, a fiber friction washer, a locknut or snap-on retainer, and a 1-1/2 inch tailpiece with a fresh slip joint washer. Most retail kits include everything except the sealant and, on brands such as Kohler, the tailpiece.
Check the box first. Kohler’s K-8799 spec sheet says the Duostrainer ships less tailpiece, so reuse the old one or buy a 1-1/2 inch tailpiece. Moen’s 22036 includes the drain assembly and locknut.
| Part | Size or spec | What it does | Leak symptom when it fails |
|---|---|---|---|
| Strainer body and flange | Sold as 3-1/2 in; Moen 22036 fits a 3-5/8 in outlet | Lines the sink opening and carries the basket | Crack or pitting lets water through the metal itself |
| Plumber’s putty or silicone | Rope under the full flange rim | Seals flange to sink top, the main water seal | Drip down the outside of the body, worst with a full bowl |
| Rubber gasket | Matches the strainer body | Cushions and seals the underside of the sink | Seep at the underside of the sink deck |
| Fiber friction washer | Sits between gasket and nut | Lets the locknut turn without twisting the rubber gasket | Gasket bunched or torn, nut will not draw tight |
| Locknut or retainer | Large nut on the body threads | Clamps the strainer to the sink, sink 0 to 3/8 in thick on the Moen 22036 | Strainer spins in the hole, drip at the nut |
| Tailpiece and coupling nut | 1-1/2 in; Moen outlet thread 1-1/2 in 11.5 NPSM | Carries water down to the trap or baffle tee | Drip at the coupling nut only while water runs |
| Slip joint washer | 1-1/2 in | Seals the tailpiece into the trap or tee | Wet slip nut, drip after draining a full bowl |
To see where the tailpiece goes next, our kitchen sink drain plumbing diagram labels every piece down to the wall.
What size basket strainer fits a kitchen sink?
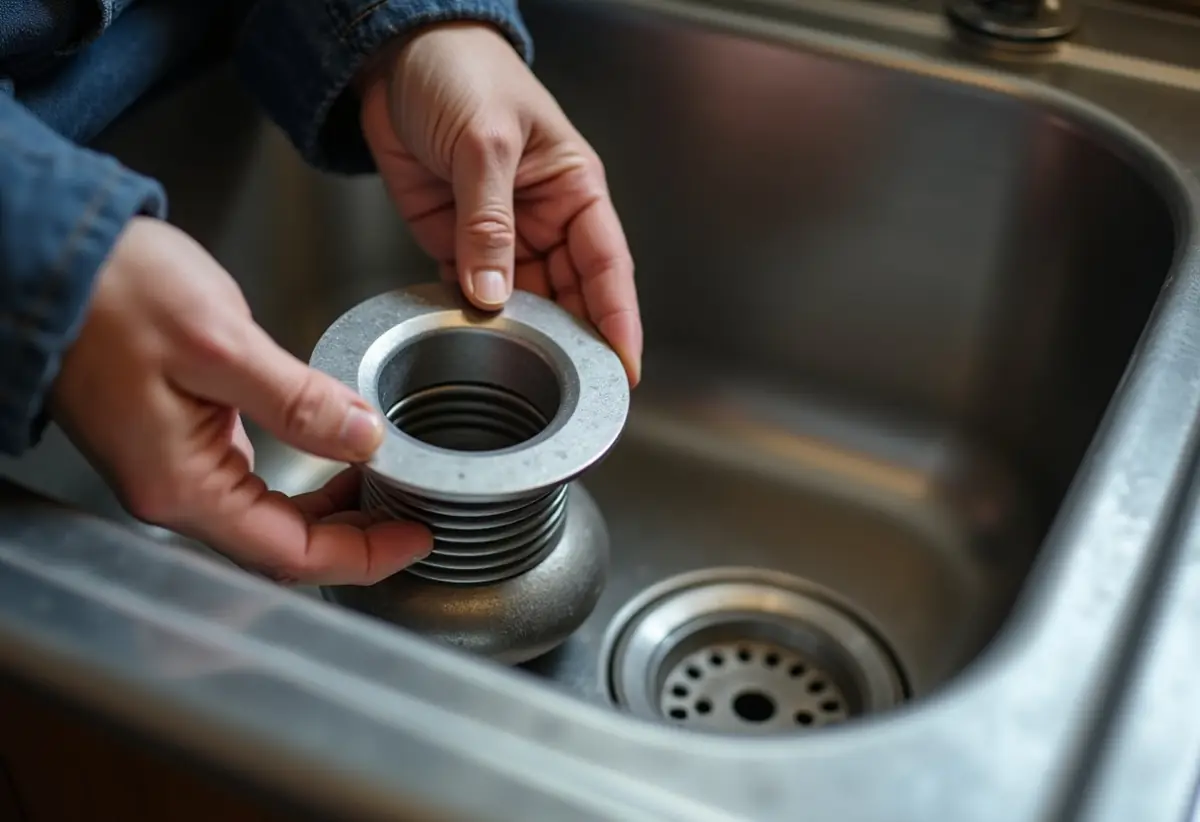
Buy a 3-1/2 inch strainer for almost any US kitchen sink, then confirm by measuring the hole across. The 3-1/2 inch label is a nominal size. Moen says its 22036 fits sinks with a standard 3-5/8 inch outlet, and Kohler builds the K-8799 for 3-1/2 inch (89 mm) or 4 inch (102 mm) outlets.
Three more numbers decide fit. The Moen 22036 spec sheet lists a 0 to 3/8 inch sink thickness range, so a thick fireclay or composite deck may need a longer threaded body. Kohler lists the K-8799 flange at 4-1/2 inches (114 mm) across and 2-7/8 inches (73 mm) deep. The outlet thread, 1-1/2 inch 11.5 NPSM on the Moen, must match your tailpiece nut.
- Bar and prep sinks often use a smaller drain opening, so measure before buying a 3-1/2 inch kitchen strainer for them.
- Basket-only replacements also come in sizes. One retail listing sells a 3 inch replacement basket for 3-1/2 inch crumb cup strainers that drops into the existing body.
Should you use plumber’s putty or silicone on a kitchen sink strainer?
Use standard plumber’s putty on stainless steel and enameled cast iron sinks, and switch to an oil-free putty or silicone on granite, marble, quartz and composite. Standard putty contains oils that can wick into porous stone and leave a dark ring around the drain. Oatey Stain-Free Plumber’s Putty is formulated for setting basket strainers on those surfaces.
Putty stays soft, so the strainer comes out easily years later. Silicone grips harder but fights you at the next replacement and must cure before you fill the sink; follow the cure time on the tube. Our guide to plumber’s putty covers where it works and where it does not.
| Sink material | Sealant to use | Why |
|---|---|---|
| Stainless steel | Standard or stain-free putty | Non-porous, putty removes cleanly at the next swap |
| Enameled cast iron or steel | Standard putty | Non-porous glaze, putty fills small casting dips |
| Granite, marble, quartz | Oatey Stain-Free putty or silicone | Oatey lists these porous stones for its oil-free formula |
| Granite composite (Blanco Silgranit and similar) | Stain-free putty or silicone, per the sink’s own sheet | Oil in standard putty can stain the resin surface; Blanco’s undermount sheet uses silicone for mounting |
Two cautions. An older Oatey sheet marked the stain-free putty not for ABS, while a 2024 Oatey press release says the reformulated version is ABS compatible, so read the tub label. Some sink makers forbid putty outright in their install sheets.
What tools do you need to remove a kitchen sink basket strainer?
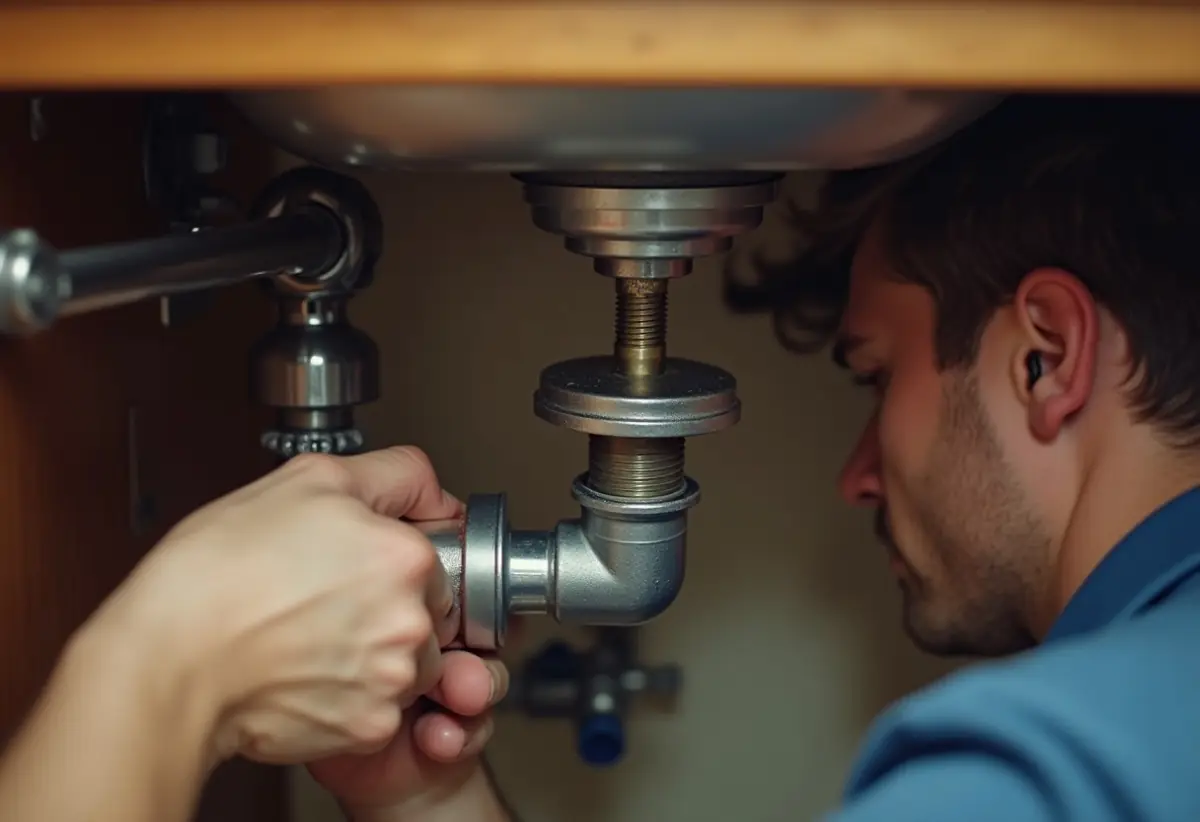
You need groove-joint pliers for the tailpiece nut, a way to turn the big locknut, a way to stop the strainer spinning from above, a plastic putty knife and a bucket. The locknut is the problem part. A sink drain spanner wrench fits its lugs; without one, a flat screwdriver set against a lug and tapped with a hammer turns it.
- Groove-joint pliers, for the tailpiece coupling nut and the trap slip nut.
- Spanner or strainer wrench for the locknut.
- Screwdriver and hammer to tap a seized locknut counterclockwise by its lugs.
- Needle-nose pliers and a long screwdriver to hold the strainer still (the pro tip below).
- Hacksaw or oscillating tool for a locknut rusted solid. Cut the nut, not the sink.
- Plastic putty knife and bucket. Metal scrapers scratch composite.
Pro tip: push needle-nose plier tips into the strainer crossbars from above, spread the handles and slide a long screwdriver between them. Brace the screwdriver against the faucet and the strainer cannot spin while you turn the locknut.
How do you replace a kitchen sink basket strainer, step by step?
Replacing a kitchen sink basket strainer takes 12 steps in two halves: disconnect and remove the old strainer, then seal, clamp and reconnect the new one. iFixit’s strainer replacement guide follows the same order: loosen the nut under the basket, lift the basket out, free the tailpiece from the trap adapter, then reverse the order to install.
Remove the old strainer
- Empty the cabinet and set a bucket under the trap.
- Loosen the slip nut where the tailpiece enters the trap or baffle tee, then the coupling nut at the bottom of the strainer. Drop the tailpiece out.
- Hold the strainer from above with the pliers and screwdriver trick.
- Turn the locknut counterclockwise with a spanner, or tap a lug with a screwdriver and hammer. Cut it if it is rusted solid.
- Slide off the locknut, fiber washer and rubber gasket, then push the strainer up and out of the sink.
- Scrape every trace of old putty off the sink rim with a plastic knife and dry the opening.
Install the new strainer
- Roll putty into a pencil-thick rope and press it all the way around the underside of the new flange. On stone or composite, use stain-free putty or a silicone bead.
- Drop the strainer into the hole and press down firmly, turning it slightly so the putty spreads.
- From below, slide on the rubber gasket, then the fiber washer, then thread on the locknut by hand.
- Hold the strainer from above and tighten the locknut until putty squeezes out evenly all around and the strainer no longer turns. Stop there.
- Wipe the squeeze-out from the bowl. Reattach the tailpiece with its washer and coupling nut, then seat it in the trap with a new 1-1/2 inch slip joint washer.
- Run the leak test in the next section before you reload the cabinet.
If the strainer is coming out because the whole sink is being swapped, set the strainers on the new sink before it goes into the counter; our guide to installing a new kitchen sink covers that order.
How do you leak test a new kitchen sink basket strainer?
Test the flange seal and the tailpiece separately. Plug the drain, fill the bowl to the overflow height or near the rim, and hold a dry paper towel against the locknut and the underside of the sink for several minutes. Then pull the plug and watch the tailpiece and slip nuts while the full bowl drains. iFixit ends its guide by running water to check for leaks.
A full bowl loads the flange seal harder than a running faucet, and draining it fills the tailpiece and trap at once, which is when a cocked washer weeps.
- Wet locknut with a full bowl, dry with the plug pulled: flange seal. Snug the locknut slightly; if that fails, pull it and re-putty.
- Drip at the coupling nut only while draining: tailpiece washer missing or cocked. Reseat it.
- Wet slip nut at the trap: replace the slip joint washer and align the tailpiece straight.
Why a strainer leaks after replacement
A new strainer usually leaks from too little putty, too much tightening, the gasket and fiber washer in the wrong order, or a cocked tailpiece. Overtightening squeezes out most of the putty and leaves dry metal against the sink.
Old strainers fail differently. Putty dries and cracks, steel locknuts rust, and plated bodies pit through. On an older home the strainer may be one of several worn parts; our overview of how kitchen sink plumbing fits together covers the supply side as well.
Call a plumber when a fused locknut sits on cast iron or stone you cannot risk cracking, when the drip comes from a crack in the sink, or when the tailpiece is corroded into a fitting that will not come apart.
How much does a kitchen sink basket strainer cost?
A plain 3-1/2 inch stainless strainer with drain assembly costs about $14 to $29, and a solid brass designer strainer costs $80 to $145, based on October 2026 listings for the Moen 22036 and Kohler K-8799. The spread inside each model comes from the retailer and, for Kohler, the finish.
The Build.com Kohler price is Brazen Bronze, a special order; Ferguson listed Brushed Bronze at $92.78 and Houzz listed Vibrant Brushed Nickel at $107. Add a tub of putty; one retailer listed 9 oz of Oatey Stain-Free at $5.99.
Price buys material and finish, not a better seal. The Kohler body is solid brass, certified to ASME A112.18.2/CSA B125.2 per its spec sheet; the Moen is stainless. Both seal with putty above and a gasket, washer and locknut below.
How we sourced this
We consulted 12 sources in October 2026 and cited 8: the Kohler K-8799 spec sheet, Moen’s 22036 product page and spec sheet, Oatey’s Stain-Free putty product page and 2024 press release, iFixit’s strainer replacement guide, and October 2026 retailer listings (Build.com, Ferguson, Moen, Walmart, GoSource, Houzz) for prices. Prices are point-in-time snapshots. We did not find Blanco’s strainer sealing instruction for Silgranit, only its undermount sheet, which uses silicone. We left out per-step times and locknut turn counts because no maker source we read gave them.
Frequently asked questions
Can I replace a kitchen sink strainer myself?
Yes. The job needs a new strainer kit, plumber’s putty or silicone, groove-joint pliers, a spanner or a screwdriver and hammer for the locknut, and a bucket. iFixit’s guide covers it in a handful of steps. The hard part is usually a corroded locknut on an old strainer, which may need to be tapped loose or cut off.
Should I use plumber’s putty or silicone on a sink strainer?
Use standard putty on stainless steel and enameled cast iron sinks unless the maker says otherwise. On granite, marble, quartz or composite, use an oil-free putty such as Oatey Stain-Free, which Oatey formulates for basket strainers on natural stone, or a silicone sealant. Oil in regular putty can bleed into porous stone and leave a dark ring.
Why is my kitchen sink strainer leaking underneath?
Most strainer leaks come from dried, cracked putty under the flange or a loose locknut. Water that seeps past the flange runs down the outside of the strainer body and drips off the locknut, so the drip looks like a bottom leak. A drip that appears only when water runs points instead to the tailpiece coupling nut or slip joint washer.
What size is a kitchen sink basket strainer?
Most US kitchen strainers are sold as 3-1/2 inch, the nominal size of a standard kitchen sink drain. Moen says its 3-1/2 inch 22036 fits sinks with a standard 3-5/8 inch outlet, and Kohler builds its K-8799 Duostrainer for 3-1/2 inch or 4 inch outlets. Measure the hole across before you buy.
Does plumber’s putty go under the rubber gasket?
No. The putty goes on top, under the strainer flange inside the bowl. The rubber gasket and the fiber friction washer go on the threaded body underneath the sink, in that order, then the locknut. Putting putty under the rubber gasket gives the nut nothing firm to bear on and can let the strainer spin while you tighten it.
How tight should a basket strainer locknut be?
Snug enough that putty squeezes out evenly all the way around the flange and the strainer no longer turns, and no tighter. Cranking the nut can squeeze out most of the putty and distort a thin stainless sink. Hold the strainer still from above so the flange does not smear the fresh seal while you tighten below.
Can I replace just the strainer basket and not the whole drain?
Yes, if the leak is not at the drain body. A loose basket that will not seal or a broken post is a basket-only fix. Franke sells its 906 universal sink strainer basket as a replacement for this case. A drip under the sink means the body seal or locknut has failed, and a new basket will not stop it.